Friday, May 1, 2020

Emergency Preparedness Important Checklist


This is a great checklist provided by the City of Houston.  www.readyhoustontx.gov

With the COVID-19 pandemic right now, it would have been a good idea to use this list on the right of the page to help prepare for your family for staying in place.    The list includes masks, disinfectants, and other things that help keep you safe.

The list on the left side of the page give you a sampling of what can be found in All They'll Need to Know.    If you had AT LEAST the things listed here, you'd have more than most people do.  

We have a friend who went to the emergency room on April 1, testing positive for COVID-19.  During his two week stay, his wife wasn't allowed to be with him, and in the end, he passed away.  She's been going through paperwork since April 14th, trying to get his affairs settled.

I have another friend who is battling cancer, and although she received her diagnosis in November 2019, just two weeks ago she started failing fast, and doctors told her to get her affairs in order.  I was there earlier this week to witness documents being signed by her to help her family during their deepest time of stress and transition.   

In speaking to groups about the importance of having this information in one place, I've actually had people say, "Oh, I don't need to do that.  I have a will.  Besides, when I'm gone, I'm gone.  My spouse can figure it out."    What do you say to that person who is so insensitive that he just doesn't care about the mess he/she is leaving for their spouse?

This isn't just about dying, though.  There are lots of reasons we may have to evacuate our homes, and if you ever have to do that, because of ensuing wildfires, tornadoes, hurricanes, or flooding, it is important that you have this information in your 72 hour kit so you can carry it out with you.  When it's time to file claims, you're going to need all the information you can get your hands on.


Sunday, December 16, 2018

Tracking Income and Expenses with Mint

For many years I paid for Quicken to track my expenses.  It's about $50 to purchase, and while I loved the way it worked, I got tired of having to upgrade it every year or two to keep the features.  They would force you to upgrade or they would stop downloading transactions.  Even though I was happy with what it offered before the upgrade, part of what I liked about Quicken was keeping the transactions up to date.

I decided that in retirement, and re-evaluating the way we spent our money, it was an expense I could eliminate.

I decided to try Intuit's Mint.  It's totally free, and if you just enter your banking information into their secure site, the program downloads and syncs transactions for you every day.  It's always current, practically to the minute.    It even works with your investments, AND allows you to enter loans as well as assets.

In trying to be prepared for filing my taxes the first quarter of 2019, I decided to scroll through all of my transactions for 2018 and make sure they were categorized correctly.   They have plenty of standard categories to choose from, but you can also create your own.  Under income, for example, I can designate what comes from Social Security, or my Etsy shop. 

Once you set the category for an expense, like electricity, it will generally continue to put that payee in the same category, but one thing that I realized I needed to change was payments to credit cards.  For example, we have a Wal-Mart card that we use primarily for fuel because we get a discount by using it.  We pay it off every month.  In my register, however, it was showing Wal-Mart payments as "shopping."  I was able to go in and change that to "Transfer:  Credit Card Payment."   If I wanted to, I could create another category that read, "Transfer:  Credit Card Payment to Wal-Mart."

While you can set budgets in Mint, I have also found that it helps to have a spreadsheet to see what expenses I have coming up.   For instance, I will enter my income and dates it should be deposited, and list all of the expenses for the month.  I usually have about three months entered at any time, so that I can see that on those rare times that I have extra money, I still can't spend it because I have an expense coming up later.   While it would be great to look at that balance and think I have extra to spend, usually that is not the case. 

Mint will allow you to go in and add future transactions, and then when they come in, they will match up, but I have found that it is a bit time consuming.  I like using the spreadsheet.  While it may seem like double work, it helps me stay on track.  I just have columns for:

Date
Payee
Deduction
Deposit
Balance
Bank Balance

And then I do a formula to keep a running balance at all times.  I just have to be careful to include the deductions as a negative number!  One time I thought I had loads of money in the account, only to discover that I'd entered them as a positive.

When checking in with Mint, I will enter the balance the bank shows, and then use another column to add my balance plus any outstanding transactions to make sure we agree.

These may seem like extra steps, and perhaps you have a better way of doing it, but it really helps me have a good snapshot of where my money is going. 

By the way ... while going through personal files and documents, this is a great time to record information that would be helpful to you in the event of an evacuation, or for your family in the event of your absence.  My ebook, All They'll Need to Know, is a quick download, and available on my Etsy shop for $9.95.    You can get started today and enter the information from your computer.  


Saturday, December 15, 2018

Year-End Medical Expenses


As the year starts winding down, I've started thinking about what I'll need to file my taxes for 2018.  Having given up our business and retired two year ago, this will be the first year that my only concern will be our personal income and expense.  I won't need the help of my CPA to file my taxes and am excited to download Turbo Tax and do it on my own.

This week I went through a pile of receipts that needed scanning.  We've had a lot of dental expense this year - a total of two root canals, a couple of fillings, and two crowns - and I wanted to see if we had enough to use the medical expenses as a deduction.

I started a spreadsheet and went through not only receipts, but checking account and credit card information to see what documentation I had.  At one time I used Quicken to track everything, but in retirement and cutting unnecessary expenses, I find that Intuit's free version, Mint, works just fine.  Next, I logged each expense for these categories, including the date of service and payee.

I might add that while some of our doctor's visits only cost us $5, and often we just pay cash, it's important to keep the receipts.  We use our debit or credit cards for almost everything, and I like to do that because it's easier to keep track, but if you pay cash, don't forget about those payments.

Doctor
Dentist
Prescriptions
Hospitals
Insurance (Medicare)

Doctor expenses were minimal.  We fortunately don't have to take any regular medications, so this was just for drugs prescribed for short-term illnesses.  My husband had a one night stay in the hospital and that was a whopping $75.   Insurance, which for us is Medicare, is broken down at the end of the year on our Social Security statement.  I looked at the amount we claimed last year, and since there were no changes, I'm expecting it to be the same.  However, I will adjust when we get the final this year, just in case.

I'm off to a good start.  Hoping that we don't have anything to add to that in the last two weeks of the year, I already have a good idea of what I can claim for medical expenses.

Stay tuned for more as I work on our taxes.

By the way ... while going through personal files and documents, this is a great time to record information that would be helpful to you in the event of an evacuation, or for your family in the event of your absence.  My ebook, All They'll Need to Know, is a quick download, and available on my Etsy shop for $9.95.   You can get started today and enter the information from your computer.  


Sunday, September 10, 2017

Documenting Belongings for Insurance

We are in the process of documenting our losses.  What a horrendous task to go through hundreds of items and take pictures.   While some of it may just be junk, it's important to document it all, because every penny counts when you're trying to reach the maximum for insurance coverage.

Your camera is your friend and can help you simplify some of this documentation.  At least you won't have to sit there and write everything down.  You'll have the photos, so just look at them from the comfort of your home instead of spending more time in your smelly, slimy surroundings.

Here are some things we're doing that we feel will help simplify the claim, and hopefully rush the payment.

Have a system.  We had several people pulling items out of the barn, and we put the stuff in piles.

1.  Electronic or mechanical

2.  Food items that will have to go to the dump

3.  Clothing 

4.  Things that can be cleaned


Take a white board, chalk board, or whatever you have, and write a number on it.  Place that white board next to the item so that when you take the picture, it shows.  Then use that corresponding item number on your spreadsheet.  Once you upload the photos, you'll be able to go back and do a description.

Take a picture of the actual model number and serial number for any items.  This will help you when you're trying to determine a value.

If your item is still in the box, take a picture of it IN the box, and then pull it out and take a picture of the item BESIDE the box.  If your item is new, insurance will not depreciate it.  Don't forget to number it.


1.  We are hoping that the electronic or mechanical items may dry out and be usable again.  We don't know that at this point, though, so we are adding them to the list.  It could be dangerous to use them even if they work because they could damage the item we want to use them with.

2.  Most of our food was in cans or sealed buckets, but I did have a tub of sugar in plastic bags, and also some wheat in mylar bags.  I'm not taking a chance on any of that.  It's going to the dump.  Same thing goes for the soda cans and bottles that were in our refrigerator.  I wouldn't drink out of them.

The aluminum cans that have dry food inside are starting to rust, but we are going to remove the rust and save them.  You can tell the food is still dry because you can hear it when you shake the can.  The buckets will have to be washed and then submerged in a bleach/water solution.

3.  FEMA recommends getting rid of ANY clothing or fabric items that were in the flood waters.  I've been hearing about people washing these clothes, but the mold spores and bacteria in those clothes are dangerous.  If you insist on washing them, at least use a mold inhibitor and wear a mask.  Personally, I wouldn't want the clothes in my washer, and I sure don't want the dryer spewing those mold spores through my house.

4.  We have a lot of tubs that were filled with water, or are just dirty from the sediment.  We plan to use a strong antibacterial product to clean them so that we can store other items in them.    


Once we have determined what we might be able to salvage and what is trash, it's going right to the trailer to take to the dump.  Fortunately, there is a free dump site set up about 5 miles from us, and we are able to take our stuff there.


Thursday, September 7, 2017

Hurricane Harvey 2017


We made every preparation we thought we'd need, but at the last minute, we still evacuated.  The preparations you make when you're planning to hunker down are totally different.  I had spent the day baking and organizing, feeling secure that I didn't have to rush out for water or food.   I even had our lanterns and candles ready to use.  We were set.

And then it was brought to our attention that the creek that runs through the property holds 18 feet of water before it floods.  They were predicting 27 feet!  We live on a big piece of property next to our daughter.  When there was flooding last year, our homes sat like islands in the midst of the water but they didn't flood.  This time, with so much more water, it was likely that they would.

At 9 pm on Saturday, with Harvey about to hit Corpus Christi, we made the decision to leave.  We packed bags and moved things to countertops and beds that might get wet if we flooded.  I grabbed my notebook of important documents and took it with me in case the house was totally destroyed.  I thought I was prepared. By 10 pm we walked out the door and headed for a hotel about 10 miles away.

As predicted, the creek went out of its banks and flooded our property.  The water got to within an inch or two of going into our homes.  Thank goodness these homes are built up about 5 feet or they would both have been total losses.  The barn, although it sits on higher ground, is not built up, and about 4' of water got inside.  This isn't a barn for animals, but has been used for storage.  I have one room designated for food storage and survival items, and while I was concerned, I knew that most of the food would be okay because it's either sealed in five gallon buckets or #10 cans.


We evacuated on Saturday night and couldn't get back to the property until Wednesday, so the water had been inside the barn and left its residue for four days.  I was shocked to open the door to my room and see all the tubs and buckets scattered everywhere.  The water had just picked them up and dropped them again.


In starting to clean up, here's what I discovered:


1.  The 5-gallon buckets that had been sealed properly were fine.  I've learned that the food should not be affected if I wash the buckets off and submerge each one in a solution of bleach/water for 10-15 minutes.

2.  The twisty lids that allow you easy access also allow water and air inside.  Fortunately, I only had one of those in the barn filled with pasta.  I keep one under my cabinet in the house for flour because I go through about 25# of flour every month or so.  I like to bake bread.

3.  The typical tubs often have holes underneath the handles, so if water gets up to that point, the inside will fill with water.   I had stored bags of organic sugar in one of my tubs and had to throw them all away.  Even if the tubs don't have the air holes, and even if they do have the latch that holds the lid secure, it won't keep water out.  I've spent many hours using the Shop Vac to remove the water just so that the tub is light enough that I can lift it.

4.  Everything in the room is covered with silt, or dried dirt that remained.  The floor is slick and slimy.

5.  Even though my 5-gallon buckets were neatly stacked, the water was strong enough to move them.

6.  I'm really glad that our sleeping bags and camping equipment was on the top of the shelf in trash bags.  Another bag of extra pillows was not so lucky because trash bags just don't keep water out.

We are still waiting for the flood insurance adjuster to come out, but here's what I've been doing in the meantime.

1.  Removing water with the Shop Vac from the tubs, 
2.  Carrying the flooded tubs/boxes outside in hopes that the sun will dry them out,
3.  Removing as much water as possible from the floor.  I can already see damage to the walls, and they will all have to be removed, but I wanted to get the water out so it wouldn't cause further damage.  Am glad we don't have carpet to remove.
4.  Using fans and dehumidifiers.  I have a dehumidifier going in that room, and also have a ceiling fan.  I have to dump the water in that dehumidifier at least once a day. 
5.  Keeping the doors open during the day to let air flow.  Air is your friend at this point, and if it's moving, even better.

These items have been valuable to me in the cleanup:


N95 masks.  It just is not safe to breathe the air around this toxic flood water.  If you're removing sheet rock, it's not safe to breathe the toxic dust that's in the room, either.  Make sure they are N95.  This one has that extra filter in the center, but not all of them do.   We were fortunate enough to have a couple of boxes of these in our supplies, and I've been told there is nowhere to buy them in Houston now.

If you have allergy problems, I'd also be sure to take your allergy meds.  I also walked away from the barn, removed the mask, and took deep breaths of fresh air occasionally just because the smell is nauseating.  It's hard to get it out of your lungs, and I swear, you can even taste it.


Gloves.  I've been wearing TWO of these gloves and also a pair of leather work gloves on top.  The other night I cut my finger while chopping potatoes and I was worried about that contaminated water getting into that cut.  I applied Melaleuca oil to the cut, covered the cut with a bandage, and took the extra precaution to wear two gloves.  Each time I went back to the house, I washed my hands again and reapplied the oil, bandage, and got new gloves.  I've heard too many stories about people getting really sick, or even losing body parts because of the contaminated water.   I wore the leather gloves over the nitrile just to get a better grip.  (I'm allergic to latex, so that's why I use the nitrile.  Latex works, too.)


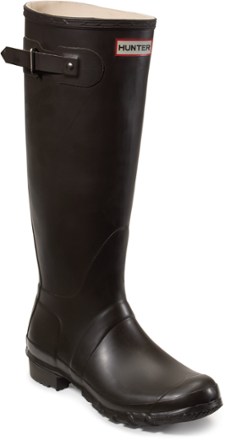
Image result for rain boots for women


Choose your shoes wisely.  Rain boots may not be comfortable when you're on your feet all day, but at least wear a pair of sturdy shoes that will not only protect your feet but help keep them dry.  Remember that you are working in or around contaminated water.  We joined a work crew through our church on Sunday and helped remove sheet rock and cabinets from a house.  At that point the house was dry, so I wore tennis shoes.  Had it not been for some arch supports I stuck in those shoes that morning, I'd have spent the day at the emergency room.  They were removing cabinets, and nails were sticking up out of the floor.  I didn't see them and stepped right down on one.  I took my shoe off to see if it broke the skin, and there was a hole on the inside of the shoe, but it didn't reach my foot.  Lessons learned.  Pay attention and be safe.

On the topic of clothing, I'd also wear long pants and long sleeved shirts.   Anything that helps put a barrier between you and the water, sheetrock, or fiberglass will help.  


Image result for bug spray
Bug Spray.   When you have lots of water, you have mosquitoes.  While talking about bugs, you may have floating colonies of those fire ants.  Another good reason to have boots on.  You definitely don't want fire ants on your feet.



Image result for drink waterDrink plenty of water.  Stay hydrated.  Working in the heat you'll be sweating a lot.  You'll need to replenish the fluids in your body.   For now, I'd stick with bottled water.  Some water purification plants here in Houston are still under water.  We are on a well, and although the water tank has been cleaned and sanitized, we're still being very cautious.


I've noticed that when I open these tubs to remove the water, there's a pink mold already forming.  The smell of it is just something I can't even describe.   I can see why they tell you to just throw clothing away that's been in that nasty water.  Even after taking every precaution to protect myself with mask, gloves and boots, that smell lingers.  Last night, after taking a shower, I was snuggling with my six year-old grandson and playing a video game with him.  At one point he said, "Nana, you really smell bad."  Leave it to him to be totally honest.  I knew exactly what he meant.  My hands, even after washing them, smelled like that nasty swamp water.  I washed them a few more times using scented hand soap and that seemed to help. 

One other piece of advice is to let people help you.  I'm so impressed with the work our church volunteers are doing.  If you see these yellow shirts, Mormon Helping Hands, they are helping at no charge whether you're a member of the Church of Jesus Christ of Latter-day Saints or not.    They are touching lives.  I worked with this little crew on Sunday and it was so appreciated by the family.  The husband was in California, and they also have a child with special needs, so everything had to be handled by the wife.
 

At the end of the day, there's nothing like a good shower and a nap!  The work is exhausting and when you look at the pile of destruction, you'll think it will never end, but I'm attacking it a few hours a day and reminding myself that this is how you eat an elephant.  One bite at a time.


Thursday, December 24, 2015

Book Review: Prepare Your Family for Survival

Linda Loosli, founder of Food Storage Moms, is the author of  Prepare Your Family for Survival.   Linda is someone I've come to know her through her blog and the preparedness network.  I know Linda lives what she teaches and that's what made this book so wonderful for me.

First of all, I love the colors and the design of the cover.  It's yellow and black, which screams to me:  CAUTION!    These colors work great for her message because instead of trying to scare the reader, she uses common sense ideas and suggestions that make you pay attention, assess your own situation, and want to do better. 

Some of the topics covered in the book include:

* Water - We can only survive 3 days without water.  Do you really have enough to drink, prepare food, and also provide for laundry and hygiene?

* Simplifying food storage - Store what you already eat.

* Emergency cooking devices - There are several options for cooking without power.  Linda included the thermal cooker as one option because that's what she uses, but I personally use a  wonder oven because it's even more versatile - it's an insulator for hot or cold.

* Surviving without power - Everything requires power, doesn't it?

* First Aid - Do you even have the basics stored?

* Hygiene - This is so important and so often overlooked. 

* Laundry - Yes, it continues to pile up even in emergencies, so what do you do without power?

* Importance of pulling together - How families and communities can help each other.

* 72 Hour Kits - FEMA suggests every person have one because emergency teams just can't get to you the first day. 

* Essential Documents -  It is crucial to have your documents in one place in the event of an evacuation ... or even death.   Linda leaves space in the book for you to record some of the information, but if you don't want to write in the book, you could put that information in a separate notebook, or visit Prepared In Every Way for another option that allows you to type the information and save it on a flash drive. 

* Evacuation Plans - Where would you go?  Does your family know where to meet?   What if you're not all together when emergency strikes? 

Prepare Your Family for Survival is good for someone who is just wanting to get started, but it's also a good checklist for those who may have been working on being prepared for years.  It's a good review of the basics, and I know for me, her checklists helped me see that my own preps might not be as complete as I'd like them to be.  This is where Linda's experience at using these ideas in her own life can benefit others.

I guess if there was anything I'd change about the book, and it has nothing to do with the information, but the print is a bit small for my aging eyes!   When I first opened it, the print seemed really small, but once I got into it, my eyes adjusted and I had no problem at all.  I'm sure the reason for the smaller print is so that her publisher could give us as much information as possible in just under 200 pages.

While I had intended to just flip through it one night and read it later, I found myself so interested that I read it cover to cover in one evening.  Linda does a great job sharing her knowledge in a manner that is very easy to understand.  It's almost like you've got Linda right there leading you through your own preparedness journey.  Definitely an important resource for anyone wanting to be prepared for real emergencies.

Book available on Amazon.


Friday, March 20, 2015

Dealing with Paperwork


March 22, 2017
Image result for paperworkIf you look down at the bottom half of this post, you'll see what I used to do at the first of every year. In reviewing it today, I realize that so much has changed.  In the past, I had a manila folder for every account.  Now I have a scanner, and while I do still have a few paper files, most of my paperwork is managed in the folders I maintain on the scanner.  I love it because if I can't find it in the folder where I think I put it, I can do a search.  It's so much easier than sorting through an entire file cabinet.
Here's my process for handling paper.  Maybe you'll have another way of doing it that works better for you.

1.  When the paper comes in, if it has anything to do with money, I enter it in Quicken, and then I scan it.

2.  Once it's scanned, I put a check mark in the top corner, and put it in a folder that simply says, "Receipts - 2017."

3.  When I have paperwork that relates to household goods, like appliances or warranties and receipts on small appliances, I put it in a notebook.  I have page protectors inside, so I just slide the paperwork inside the protector.   Lots of times I enroll for the warranty online, so I will not only save that confirmation email, but I will also "print" to the scanner.  That way I never have to print it on paper.

4.  I have eliminated a lot of paper by stopping paper statements.  I do all of our banking online, and even our credit card statement is electronic.  Once again, I "print" it to the scanner, then balance it in my Quicken account, and schedule the payment.   Throughout the month, I have checked the balance online and entered the charges in Quicken as I go, so the balance isn't usually a big surprise. I know how much I can spend and still be able to pay it off each month.

5.  I do keep a paper file for our automobiles and a few other things where we have a lot of paperwork.  If possible, I scan it so there's always an electronic copy, but in some cases, like information from opening a new bank account, it doesn't seem worth it.

Since I've talked so much about using the scanner, I should mention that I'm using the neat desktop scanner shown here.   I am really happy with it and wish I'd bought it years ago!  I can put a stack of receipts from Home Depot, for instance, in the "receipts" slot, or use the "cards" slot for business cards.  I no longer have to keep a stack of business cards on my desk.


So what are YOU doing to cut down on the amount of paper you manage?

Joyce


Image result for dividing line
2012.  It's tax time.  Well, almost.  I've started the process of moving last year's files into a different space and replacing them with files for this year.  Many of the file folders will be the same, and in duplicating the folders, I realized that I also have files on appliances and household items.   That's not something I want filed away in a closet.   It occurred to me that maybe they should all go into a binder that anyone might be able to find.  I think binders have a useful purpose and they help me feel oh, so organized.

1.  I had an empty binder on my bookshelf, so I started by filling it with page protectors and the even cooler ones that have pockets on each side.       

2.  I pulled file folders out of the drawer and put the contents of each  one in a page protector/pocket.

3.  I used my handy, dandy label maker and made a label for the binder.

4.  I'm still thinking about whether I need to make a label for each page protector/pocket.  I'm thinking not, since you can easily see the contents.  I might want to use the protector for something else some day.   Okay.  Eliminate #4.

5.  While I was at it, I browsed through the information I was "filing" in the binder.  I realized I had at least one warranty card that had never been filled in.  Good time to do that while it's in front of me.

6.  I put the binder on the bookshelf in my office along with other "preparedness" books.    Should be a good place to keep it since I refer to those books often.  It feels pretty good to have all of that information in one place.  Since I do have some new appliances this year, and have required some minor work while still in warranty, I've already had to refer to this paperwork.  Fortunately, the first time around, I wrote in the information that was required, so it should be even easier if there is a next time. Now that I'm finished with that project, I'm ready to tackle something else.  I've eliminated a handful of manila folders from my file drawer.  Maybe now I'll go through last year's bills and see what I really need to keep.  Utility bills?  Doubtful.

What are you doing this year to make your information more accessible?

Joyce

Saturday, June 28, 2014

Funeral Ideas

I attended a funeral this week and the talks were so great that I actually took notes so I could go read the full messages.  Here they are.  All can be watched online.


Two of the most important events in life are birth and death ...


Everyone’s situation is different, and the details of each life are unique.  Nevertheless, I have learned that there is something that would take away the bitterness that may come into our lives. There is one thing we can do to make life sweeter, even joyful, and even glorious.  We can be grateful.

A Latter-day Saint’s pathway to eternal life can be compared to an Olympic athlete’s four-minute performance, said Bishop Gary E. Stevenson.


My friends think that I am obsessed with death.  I am not really too excited about experiencing it, but I'll admit that I'm curious about it.  I also like attending a good funeral where the Plan of Salvation is preached.

Red Cross Advice

The Red Cross recommends the following safety steps and tips to prepare for a hurricane.    

Click Here

Prepare for Hurricanes and Flooding

A friend of mine sent this email out to her mailing list.  I'm posting it without edits because I think the information is great!  Glad to know there are so many out there who are not only prepping for themselves, but trying to help encourage their neighbors.  What a great idea for those who are new to the area. 
if you're new to Houston, there are things you might like to begin thinking about now on hurricane preparedness for your precious family history documents / photos, etc.! 
in an apartment, planning may be different than for a house - and frame house dwellers may need some different planning than folks in brick houses ... but fortunately, there's usually some "lead time" before a storm makes landfall. you may get a couple of days to prepare - but you shouldn't COUNT on that (nor should you count on being able to buy items in the store to DO preparing, once a warning has been issued - things can sell out fast).
houston is mostly sandy and water generally seeps down or runs off quickly -- UNLESS it comes in a hurricane, at which time it can arrive in such heavy/lengthy downpours or steady/horizontal rains as to cause destruction and flooding most anywhere.
so, especially during storm seasons, you probably shouldn't routinely store one-of-a-kind photographs or original/important documents near areas that could be breached by heavy winds and rain:
- near a door or window (possible problems if glass or hinges break)
- on the floor (possible flooding)
- near roof eaves, or in an attic (possible structural damage)
- in closets with sprinkler systems (possible accidental activation during emergencies)
in an apartment, it can even cause a problem if docs/pix are stored near an outer room wall -- under eaves or between the slab and flooring are high-risk areas for water damage, and in worst case scenarios, a lot of exterior wall damage can occur.  so keeping treasured items in an interior room wherever possible - and up off the floor - is often safer.
and while it's not good for them to be KEPT in plastic - if a hurricane has been predicted, stowing photos in large stearlite or rubbermaid plastic tubs, along with a few silica gel packs, could offer some extra damage protection against rain/moisture.  there have been instances when after a storm passed the power was out for a lengthy time period (for days or even weeks), and in those cases very hot, humid conditions can develop.  during such times, even photos that seem secure in plastic tubs may be damaged by condensation, unnoticed leakage, etc.  if you have large plastic bags (gallon size ziploc bags or zippered pouches for bedspreads/quilts), you can stuff those with photos and THEN put them in the tubs.
if your old photos haven't yet been committed to online photo albums, you might also think about keeping negatives SEPARATE from photos.  If you have a bank safe deposit box (or water resistant in-wall home safe), one of those might be a good choice for storing negatives.  Then if you lost photos you'd still have negatives, or vice versa!